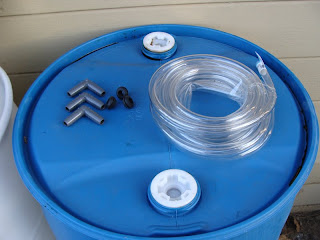
A few days before a predicted storm, I had a couple of days off, and set out to start saving the rain.
I began by acquiring two used plastic barrels from the local cookie factory. Given that they had previously contained organic molasses, a decent garden nutrient, I opted to not even rinse them out, as the trace amounts that find their way into the water will actually be beneficial for the plants.
The next step was to level out the ground where I wanted the barrels. I used cheap cinder blocks as risers, and actually leveled it so the barrels would lean slightly towards each other. When full, these barrels will weigh 350lbs each. The idea of them crashing down on my dog does not appeal to me.
I gathered the tools I needed. A drill to modify the barrels, a tape measure and level to get the right size of cut out on our down spout, and a step drill bit for placing the next fittings. I did not have a normal hack saw, so I originally intended to use the sawall here, but instead opted to use an angle grinder, as it would give me a cleaner cut. You, of course, can just use a hack saw.
In the back, you can see the box for the rain diverter I got. I got an awesome deal on it, so was happy to get such a nice one, as it normally sells for around $80. You can easily make your own with an open system, but this closes off the barrels to avoid mosquito problems, keeps dirt out of the water and allows the downspout to be used as normal when the barrels are full.
The Rain Reserve diverter came with everything I needed to set up one barrel. Even the spade bit to place their fittings in my closed top barrels. The system also comes with a nice sticker to advertise their company while warning people not to drink the saved water.
The next step in set up was to drill the inlet hole in the top of the first barrel. The manufacturer included the proper rubber grommet and insert for this, though it was a bit difficult getting the grommet through the barrel as it was a cold day and the rubber was not very flexible. Forewarned, I put the remainder of the grommets in my pants pocket to warm them up before I needed them.
Next up was cutting the existing downspout. I followed the measurements given in the manual, but double checked by measuring the gap between the inlet and outlet.
If you are renting, accept that you are going to spend $15 to replace the cut downspout if you plan to take your rain barrels with you. Most are a continuous section, and those long enough to be made up of multiple sections will almost never have the gap in the right place.
 |
| The Rain Reserve divertor in place! |
While I could have placed it higher with no ill effects, the sag of the pipe will serve as an sediment trap during the first rain of the when moss and a dry summer's worth of dust are sent rushing down the drain.
After the first downpour, the capped outlet to the left was half full of dirt.
The next step was where I left the manual behind, opting for my own method of connecting the barrels using the aforementioned rubber grommets and clear tubing.
getting the grommets in place proved to be more difficult than I expected as they are meant for a 5 gallon bucket, and the 50 gallon barrels were about 4 times as thick.
 | |
| Side view of the grommet |
In order to the grommets to fit, I lubricated the flanged end (with spit, use oil if you must) and then pushed it into place with a flathead screwdriver. Wear gloves for this step, I could have easily stabbed my hand if I had slipped.
 |
| The Grommet in place |
 | |
| The barbed fitting. |
When you place the barbed fitting into the grommet, it pushes out on the edges of the hole, making the connection water tight. Once placed, wiggle the grommet back and forth. An improperly placed grommet will just pop out. (I won't admit to how many times it took me to get this one set, but the rest were easy once I realized how it worked.)
I'll skip the barrel drilling pictures, but I placed a similar fitting on the top of the next barrel and connected the two sections with clear tubing.


